Selecting Data from a Table
Retrieving Data with Queries
Querying and Manipulating Data 2-7
Selecting Data from a Table
A simple query form looks like this:
SELECT
select_list
FROM
source_list
Here, select_list specifies the columns from which the data is retrieved, and the
source_list
specifies the tables or views where these columns are found. The
number of columns, as well as the data type and length of each column, is determined
by the elements of the select list. Note also that the select list can use SQL functions.
To see all columns in a table, use
*
for select_list.
uses the
SELECT
statement to return the information you previously saw
by viewing the
employees
table in the Data window.
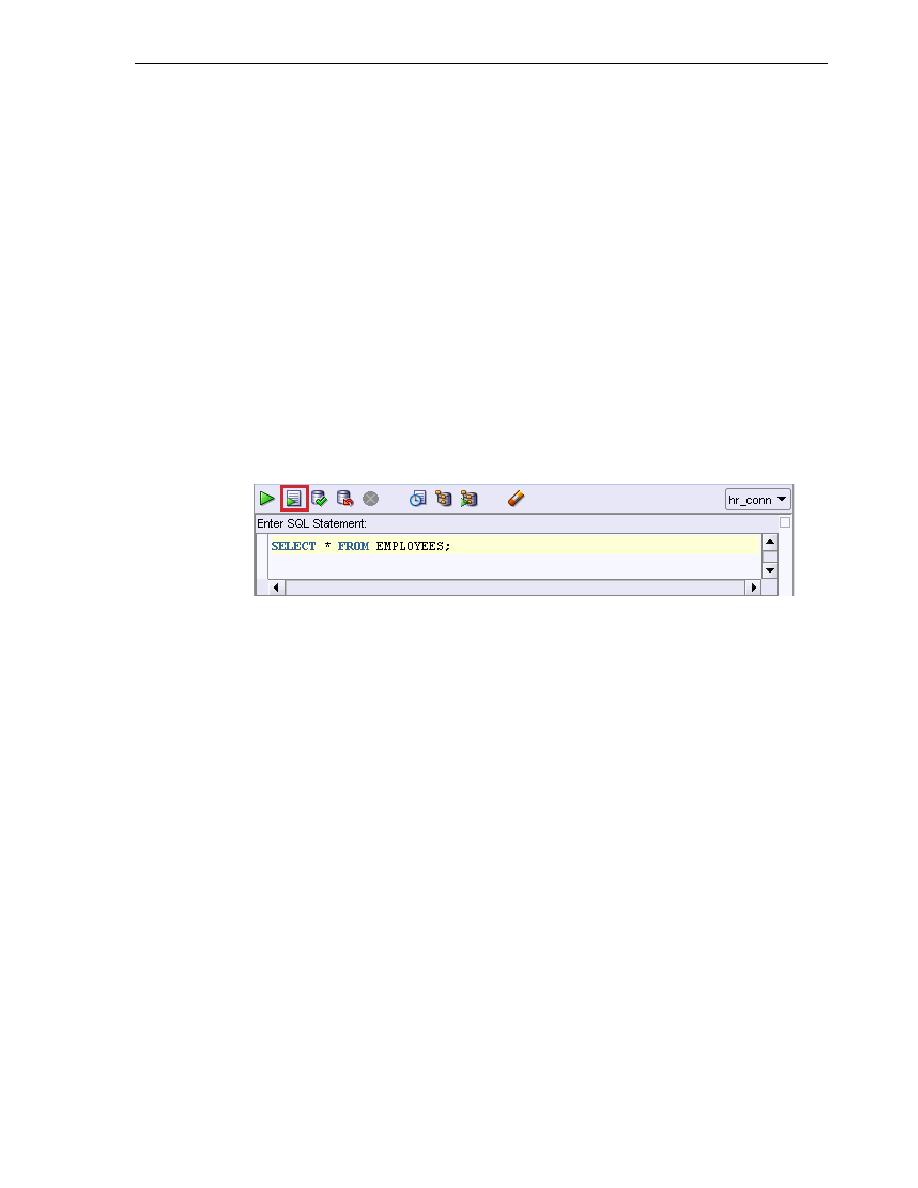
Example 21 Selecting All Columns in a Table
1.
In the SQL Worksheet pane, enter:
SELECT * FROM employees;
2.
Above the SQL Worksheet pane, click the Run Script icon. Alternatively, you can
use the F5 shortcut key.
3.
Click the Script Output tab, below the SQL Worksheet pane, to see the results of
the query.
EMPLOYEE_ID FIRST_NAME LAST_NAME ...
---------------------- -------------------- ------------------------- ...
100 Steven King ...
101 Neena Kochhar ...
102 Lex De Haan ...
...
107 rows selected
Between running different queries, you can clear both the SQL Worksheet and Script
Output panes by clicking the Eraser icon in the toolbar.
shows how to use the
SELECT
statement to return only the columns you
requested in your query, namely
first_name
,
last_name
, and
hire_date
.
Example 22 Selecting Specific Columns from a Table
SELECT first_name, last_name, hire_date FROM employees;
These are the results of the query.
FIRST_NAME LAST_NAME HIRE_DATE
---------------------- ------------------- -------------------------
Steven King 17-JUN-87
Neena Kochhar 21-SEP-89
Lex De Haan 13-JAN-93
...
107 rows selected